Behind the Scenes – A look at my cartoon process
As a kid I loved movies!
But what really fascinated me was watching behind the scenes of movies and cartoons. The process was very interesting to me. The way you can create something in your head and bring it to life was mind blowing.
I decided to create the behind the scenes of one of my comic gags.
Hope you enjoy it.
Ok, for starters I’m so unprofessional. I’ve been an artist since I was kid and wanted to be an animator for Disney, but the music bug got me. I’m still learning all the tools on what to use in my cartoons. But here goes….
Step 1 The idea.
I’ll be talking about the process of my previous comic gag in the previouse blog. If you’ve missed it click here.
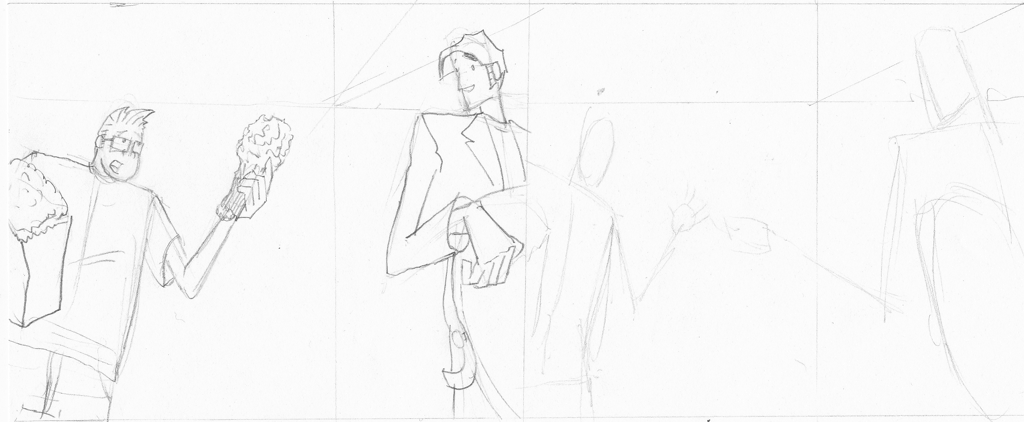
For starters I had to come up with a gag about Time. I used my usually characters, MD and Ham. These ideas don’t come easy it could take a day or two for me to come up with something that seems like it took me 5 minutes.
At my place I have a small garden with tomatoes and a potato plant growing. I was thinking of growing some herbs. So, I was thinking of: Rosemary, cilantro, basil, and thyme.
Then it hit me. Thyme! Rhymes with Time.
The two panel gag goes like this. MD is practicing on his bass and Ham walks in with a bag full of thyme that he got what he asked for. MD turns around and scolds Ham saying he meant we’re running out of Time, not Thyme!
Haha! Yes, I know corny. But, it’s funny corny.
Step 2 Tools
I need to up grade my tools and my process but this is what I use.
- Prismacolor Turqoise Pencils
- Pigma Micron Pens
- Black Sharpie Pen
- Creto Lead Holder for covering big areas
- Prismacolor Sharpener
- Gum eraser
- Presto Pen whiteout

- Mac PowerBook 17 inch
- Wacom Intuos 3 tablet and Wacom Pen
- Manga Studio EX4
- Canon Pixma MG6220 for scanning
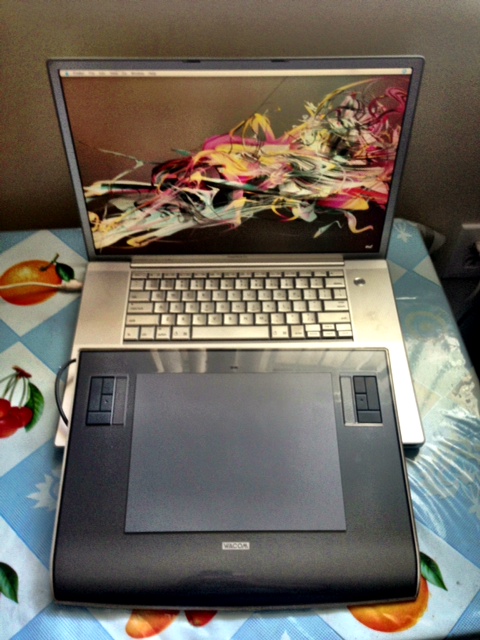


I use very dinosaur equipment and I need an upgrade but it gets the job done for now. Any donations will be helpful. 🙂
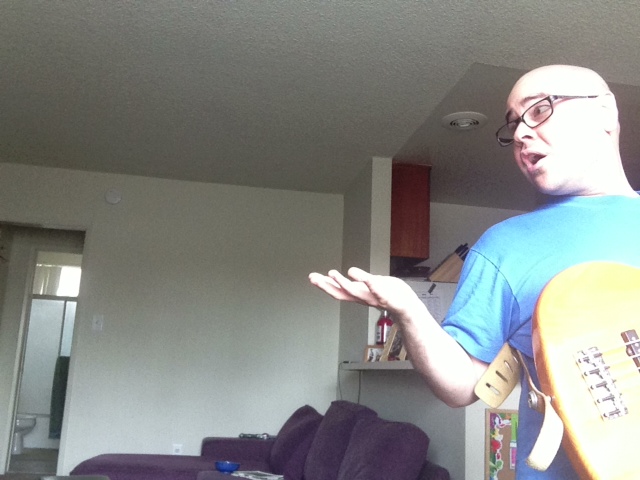
Step 3 Referances. 5-10 minutes
I used my iPhone and took a few basic poses. I just mounted it on my keyboard and took several pics. These poses were basic I would usually use my imagination to create the poses depending the difficulty but this time I got lazy.

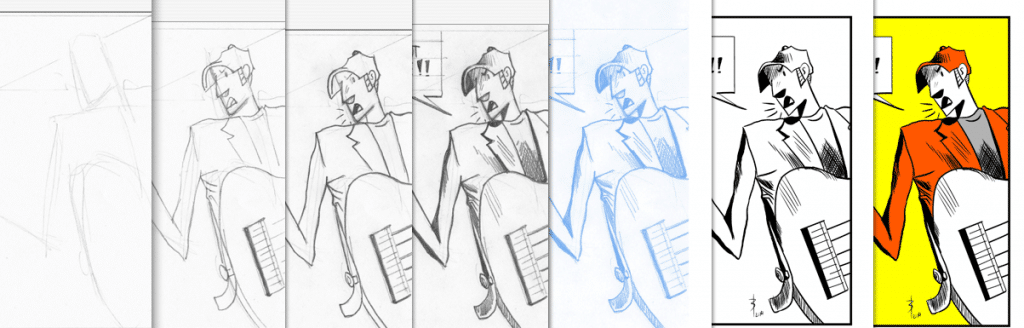
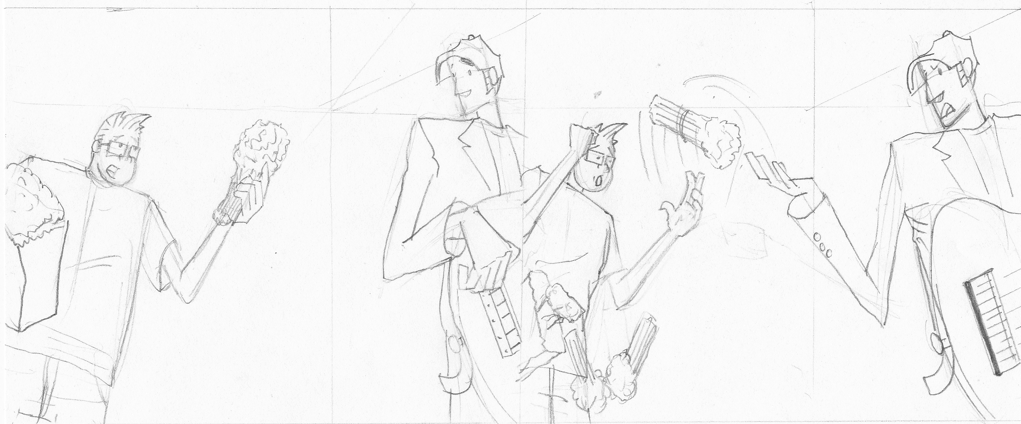
Step 4 Rough Sketch. 10-15 minutes.
I use a standard 8.5 x 11 piece of paper. One day I will upgrade to the standard comic Bristol board of 11 x 17 and reason why I haven’t is because my scanner doesn’t fit that size. Here is a rough sketch of two panels.
Step 5 Line Work. 30 minutes
Here I’m actually drawing the character lines and then darkening them to stand out.
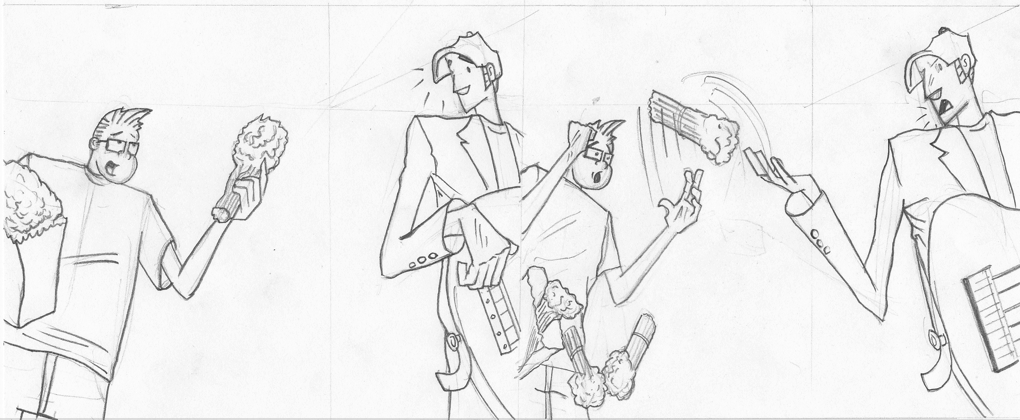
Step 6 Shadow and balloons. 1 hour or less
Adding the shadows gives the characters depth. The balloons and dialogue are also added.
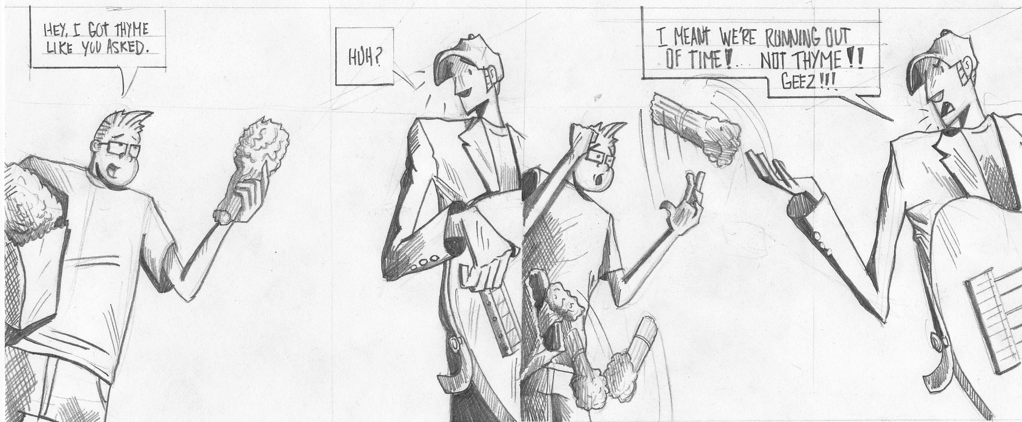
Step 7 Scanning. 5-10 minutes
The drawing is now scanned into the computer and opened in Manga Studio and converted into photo blue line for inking.

Step 8 Inking. 1 hour or less
Manga is a great tool for comics especially for inking digitally. Here is the inked cartoon.

Step 9 Colors. 30 minutes
Colors make it all pop. I just started playing around with color with my characters. I’m going for simplicity just like in popular comics like, “The Peanuts and Calvin and Hobbes.” If I used more colors it would obviously take longer.
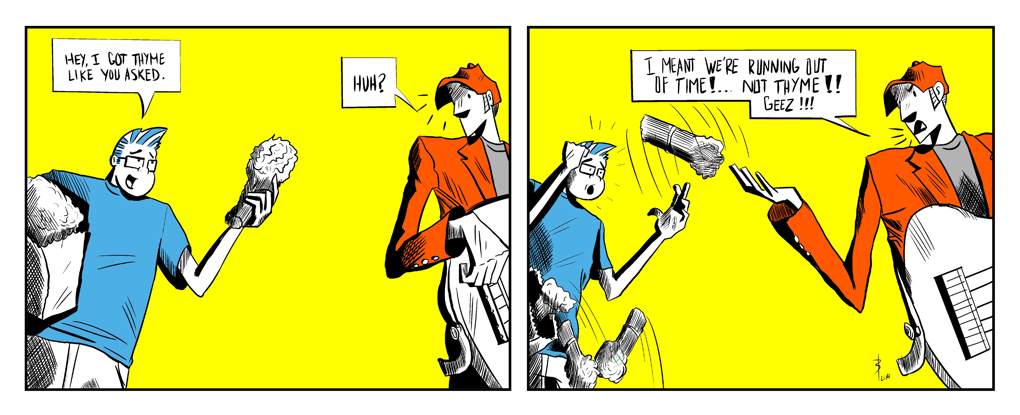
That’s pretty much it. My whole process from start to finish of a cartoon.
I hope you’ve enjoyed it and please share it with others. Onto next blog!
As always thanks and God Bless.